Information · Description · Step 1 · Step 2 · Step 3 · Step 4
Tutorial By: HITMAN-X-
Special Thanks To: Crazy Man Dan, nitebyrd, and everyone over at Paint.NET
What You Will Need: Paint.NET
This tutorial will try and explain how to make 3D looking bars using the Gradient Tutorial by Crazy Man Dan and nitebyrd. 3D bars can be used for many things and are most common in webpages for side bars and 3D buttons.
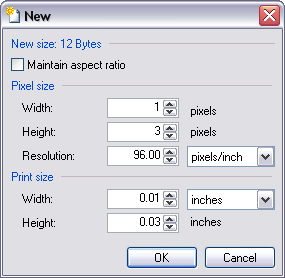
Open up Paint.NET and click File > New. You will now get A dialog box called "New" asking you for the size of the new image you want to make. For the Width put in 1 and for the Height put in 3, then click OK. Yes I know that small but trust me for now. (See the New dialog box image below for more detial)

Now go to your zoom box or use the + magnifying glass to zoom in at 3200%. Now you should see the image better. (Image below shows what your image should look like when zoom in at 3200%)
![]()
Now we will set the colors for our 3D bar. We will be using the Pencil from the Tools Menu to color each of the 3 pixels. The top and bottom pixels will be the same color and the middle pixel will be either darker or lighter then the top and bottom pixels depending on how you want your 3D bar to look.
In this tutorial we will be doing a gray and darker/black almost gray button that looks to be bulging out at you (This means the top and bottom pixels will be lighter then the middle). For the top and bottom pixel we used a light shade of gray (Color Hex: 808080) and for the middle pixel we used a daker/black almost gray (Color Hex: 212121). (See image below for better detail)
![]()
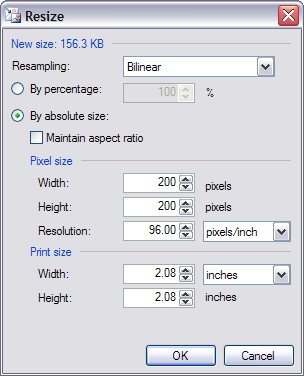
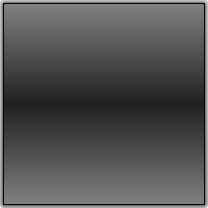
We will now need to resize this image using bilinear as the resampling. Go to Image > Resize. The Resize dialog box should open up now. Change the Resampling drop down box to Bilinear. Now change the Width to 200 and the Height to 200 (Use 200 or higher for the 1st resize. This will get a better Gradient effect.). (1st image below shows the Resize dialog box and the 2nd image shows what your 3D Gradient should look like.) PS: Don't forget that you are zoomed in at 3200% and you may want to zoom back out.


Now you can resize your 3D bar to your liking. I going to resize my image width to 200 and height to 50. This give me a nice 3D bar for a button. (See image below for more detail)

Here are some other 3D bars I did as well.


Once you do this a few times you start to know what shades of colors work best and soon you be able to make 3D bars in only 20 - 30 seconds.