
Information · Description · Step 1 · Step 2 · Step 3 · Step 4 · Step 5
Tutorial By: HITMAN-X-
Website: http://www.dextut.com
Special Thanks To: Everyone over at Paint.NET
What You Will Need: Paint.NET, Windows 10, and a place to download your new font. List of Font Sites Here!!!
This tutorial will try and explain how to add fonts to your computer so that you can use them in Paint.NET. Note: This tutorial is for Windows 10 and the fonts you download must be TrueType fonts.
Looking for the tutorial for Windows 7 or Windows XP
Lets get started by finding the site where we will be downloading our new font from (I will be downloading mine from 1001freefonts.com. A list of font sites can be found here). Ok I picked the font called Waver for windows. Now that you have picked your font you should have a download box asking you to open or save the zip file with the font. (If your using Microsoft Edge, the zip file may download to the downloads folder on it's own)
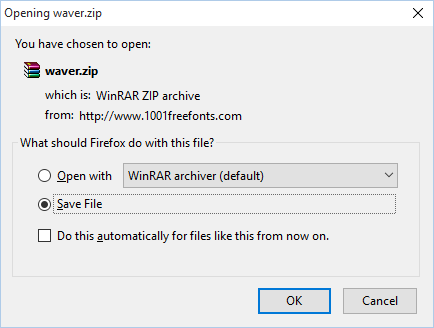
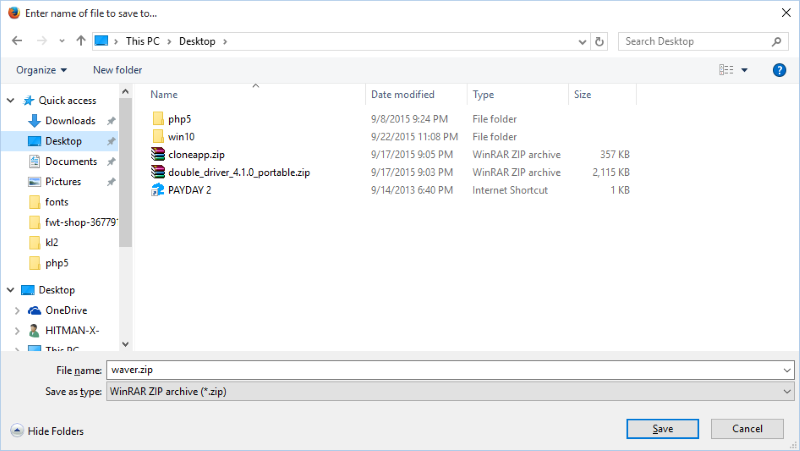
Now click Save or Ok and save it some where to your computer (I will be saving mine to my desktop, If yours was downloaded to the downloads folder, go to file explorer and you will see downloads folder under Quick Access).
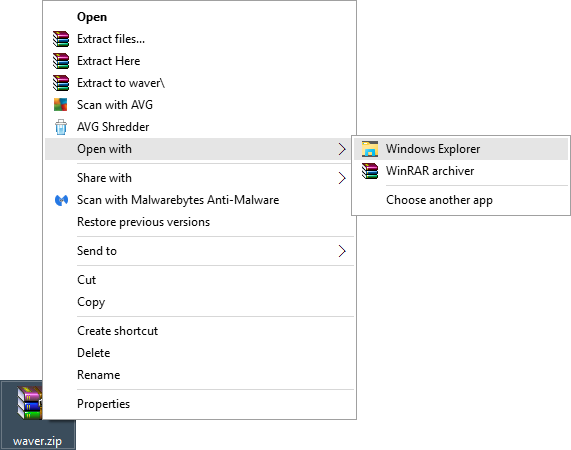
Now we will Extract the font .zip file. You may use any unzipper or opener you want but I will be using the Compressed (Zipped) Folder program that comes installed on Windows 10.
To use the Compressed (Zipped) Folder for Windows 10. Right Click the font .zip file, go to Open With and then click Windows Explorer.
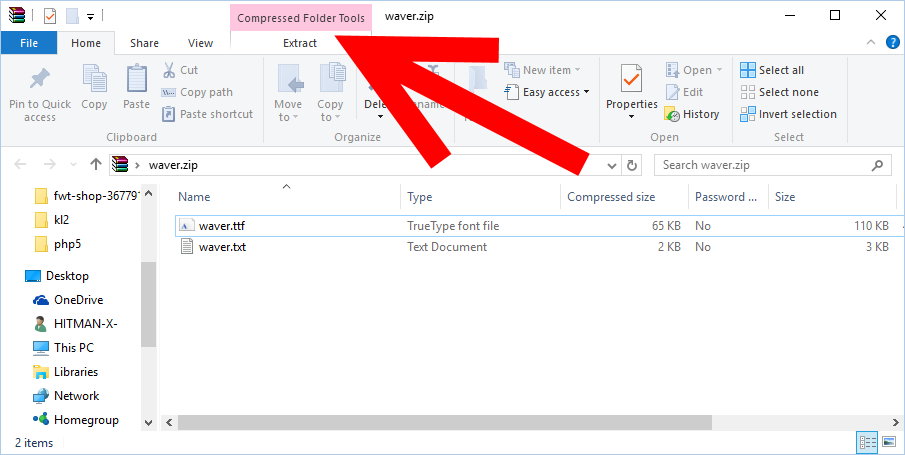
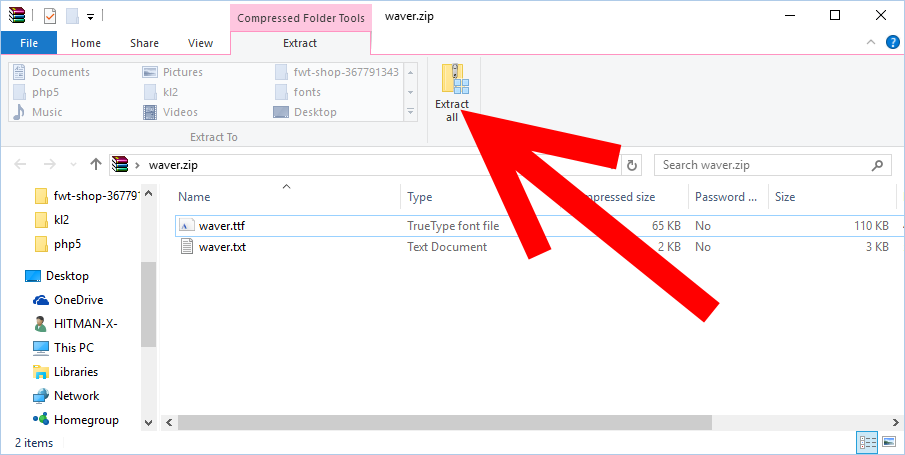
You should now see a file dialog box on your screen with your font files showing. You should see pink Compressed Folder Tools tab with Extract under it. Click this and then click Extract All. (See images below)
You should now see a dialog box asking you where you would like to extract the font too. Your dialog box may not be the same as mine depening on what your .zip program is. (See image below)
Note: I will be extracting my fonts to my desktop using the folder name of the font.

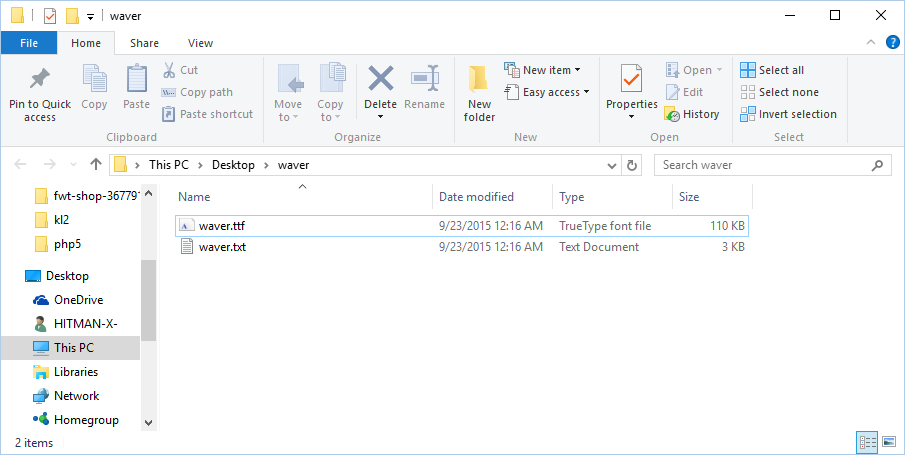
As you can see the font I downloaded is a .ttf font which is good because it a TrueType font. Now go to the folder were you extracted your font too. (See image below)
We will now Preview the font before we install it. You should always Preview any fonts you download to insure that they work before installing them.
Right Click the font file and from the drop down menu Click Preview. (See image below)

You should now get a dialog box called the name of the font that your previewing that shows you what your font will look like.
Note: If your preview does not work then that could mean the font you have downloaded is corrupted.
Now to install your font just click the Install Button on the preview window and that should be it. (See image below)

It's now time to test your font in Paint.NET
Lets test out our new fonts in Paint.NET. If you have Paint.NET open or any app / program that uses fonts then you should close them out so the new installed fonts will be loaded into the program.
Now re-open or open Paint.NET. Pick the Text tool from the tool bar menu and insert it on the canvas. Now go to the drop down box in Paint.NET for fonts and find the one you installed. Type what you want.
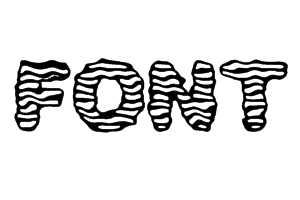
That's it. You just installed font to use in Paint.NET and other programs for Windows 10.
If for any reason you need to delete a font that you installed, you can do so by these steps.
1. Right Click your Windows 10 Start button and then click on Control Panel

2. Make sure View by: is set to Large Icons. You should see a folder called Fonts now. Click on the Fonts folder.

2. Find the font you wish to remove. Select it so that it is highlighted and then click the Delete button on the font panel. (See image below)

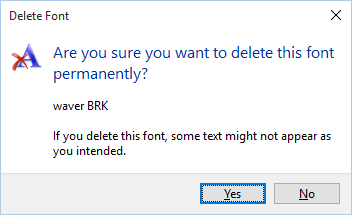
3. You will get a dialog box asking if your sure that you want to delete the font file. Say Yes if you are, or No if you want to keep it.
TIP: If you are installing a lot of fonts then it is best to install one font at a time and test it in Paint.NET. You should then make a list of fonts that work. The reason for this is because some font files will not work with others and / or the font file could be corrupted. By doing this you can pin point a bad font file.